NOTE: I am not a paid staff of Olympus and neither am i getting paid to write this article. I just happen to like their mirrorless system very much. If you have read my first few posts, you would know that I have tried almost every brand out there from various DSLRs and Mirrorless manufacturers. I settled on an Olympus micro 4/3 system because it has (almost) all the features that I need for my macro work. Read more about my journey to mirrorless here.


IMPORTANT UPDATE (Aug 2016): I have since made some modifications to the design of my diffuser and changed my flash to the Meike MK 320, as shown in the photos above. To see how well it works (or not), you might want to click here, although i would highly suggest that you read the rest of the article first. Video tutorial on how to build the above-mentioned diffuser can be found here!
-----------------------------------------------------------------------------------------------------------------------

Limacodid caterpillar under UV-Light
I know that this post is long overdue but better late than never! I would only be covering the equipments that I use for close-up macro photography and not techniques to keep this entry as succinct as possible. This was never intended to serve as a technical tutorial. However, I will be providing links to several technical reviews from better qualified individuals throughout this post so please feel free to click on those. We all have different needs and level of compromise - What has worked for me may not necessarily work for you. Feel free to adopt or expound on my ideas and if it works for you then great! And by the way, 99% of my shots are handheld with the exception of UV-Light photography where I use a small tripod. In both cases, I use Full-Manual Settings. Without further adieu, let's get started!
Author's Note: I have received some requests for a review of the equipments I use for my Wide-Angle macro and herping (reptile) shots. Be sure to subscribe in 2016 for more updates!
1. MY CAMERA BODIES.
I started out with the OMD EM5 (Technical review here) before upgrading to an OMD EM1 (Technical review here). Any difference in the image quality? In my opinion, no, although the latter has some useful features that are absent in its predecessor like Focus-Peaking and an improved inbuilt stabiliser.
Olympus OMD EM5 (Spare Body)

Front View of the EM5 (apologies for the poor IQ, pictures taken with an old point and shoot camera).

Back View. Very clean layout.

Top View.

With the Olympus HLD-6 battery grip. I highly recommend this.

Back View with the Olympus HLD-6 battery grip.
Key Features that i liked about the OMD EM5:
1) Electronic View Finder (EVF). I absolutely adore this! Gone are the days where you have to second guess yourself about setting the right Exposure or White Balance. Now you are able to see exactly how the Final Image would turn out, even before releasing the shutter! What you see is a true representation of the Final Image. Amazing!
2) Live-view Boost. With this feature, I was able to practically shoot in relative darkness because for some magical reasons, the monitor stays bright even with ridiculously small aperture values. This is absolutely crucial in macro work, especially when I have my camera stopped down to f-22, rendering the focus light useless without Live-view Boost.
3) 5-axis Stabilisation. Over time, I have developed some camera handling skills and I would like to think that my hands are stable. Having said that, I am not afraid to admit that many of my shots would not have been possible without this feature.

A tiny Cyclosa sp. with its intricate web stabilimentum design.

Argiope argentata spotted off the rugged Californian coast during my trek to the Big Sur. It was swaying wildly in the wind but thanks to the 5 -axis stabilisation, I was able to freeze the frame with the right settings and handling technique.
4) Size. It is amazing how Olympus has managed to pack so many features in such a tiny body!
5) Fully customisable. Despite its tiny size, it has more dials and buttons than a F-16 Fighter Jet Cockpit. Even more so for the OMD EM1.
Olympus OMD EM1 (Main Body)

Front View of the EM1.
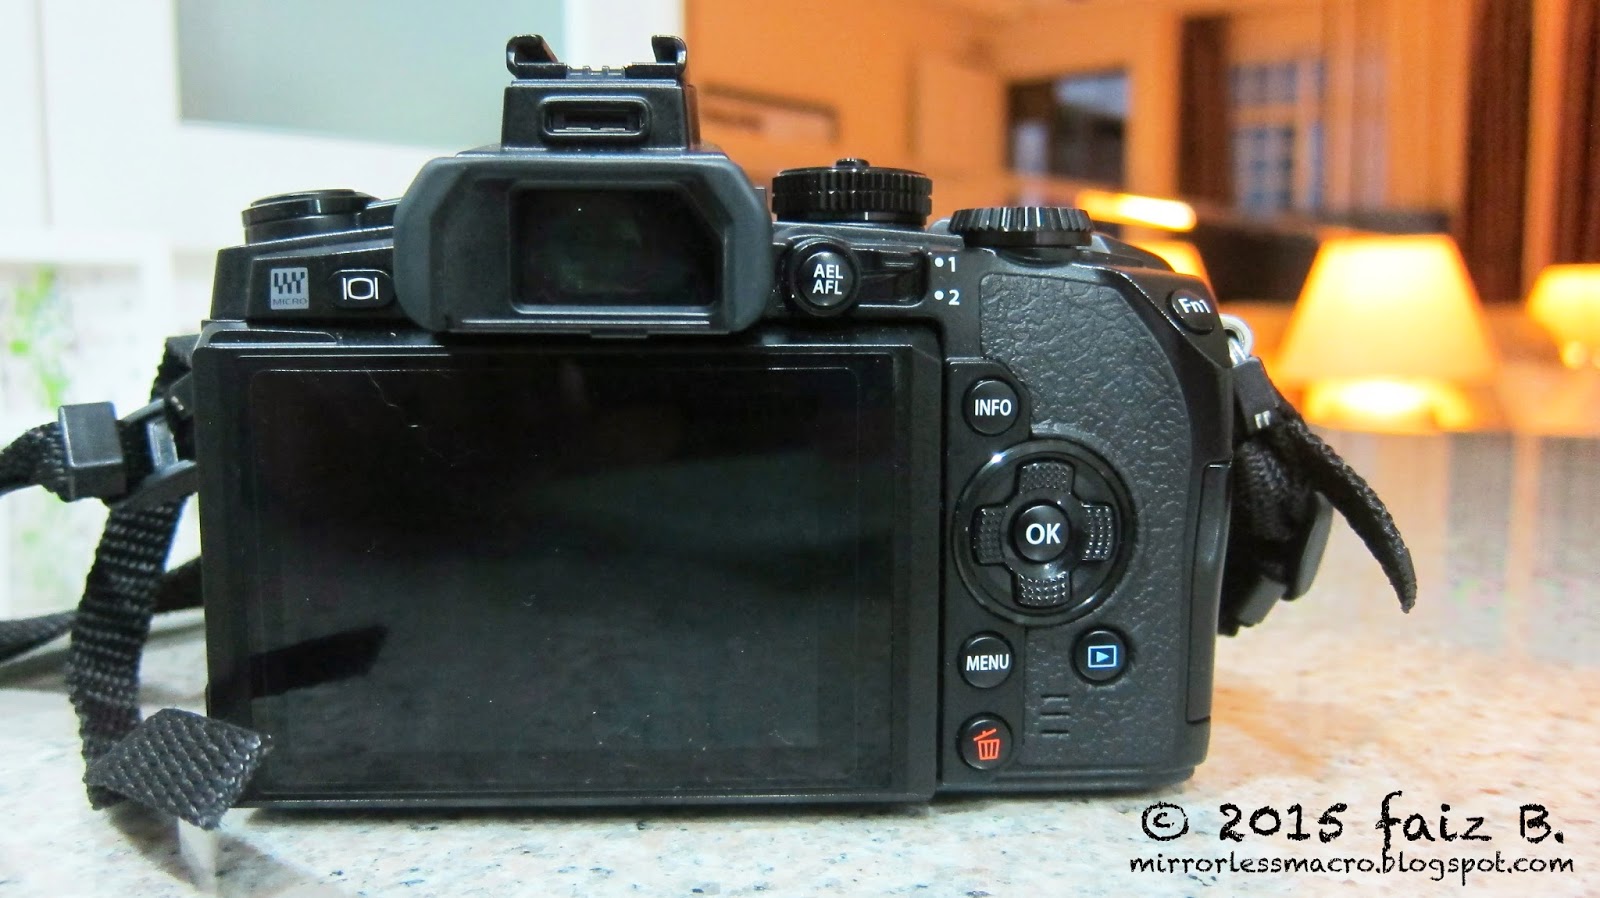
Back View.

Top View. Check out the dials! Better usability than the EM5, in my humble opinion.

View of the OMD EM1 from the side. Notice that I have the focus lights on.
Key features that i liked about the EM1, above and beyond those already mentioned about the EM5:
5) Focus-Peaking: With a simple twist of the focusing ring, I am able to identify which area is in focus, thanks to the red/white streaks reflected onto the image on the EVF. This feature is usually switched off when I am out in the field because most of my preferred subjects move faster than I can turn the focus ring, rendering it pretty useless. However, for non-moving subjects, this feature is a gem. No idea what I am talking about? Watch this awesome video tutorial by Damien McGillicuddy here!
6) Better Grip. With the EM5, I feel that it slips off the hand pretty easily after a long day of shooting. The remedy? Slap on the Olympus HLD-6 battery grip and instantly it feels like you're holding a different camera altogether. The EM1 comes with an ergonomically-designed finger grip, out of the box.
7) Better weather-sealing: The EM5 is fairly weather-sealed but nothing like what the EM1 has to offer. This tank of a camera have survived many hair-raising encounters (I am a klutz) such as falling from a moving vehicle, amongst other horror stories. I have been caught in heavy rain twice with the EM1 and despite being dripping wet, it worked perfectly fine. You might want to check Blunty's youtube video where he famously soaked the camera in a tub and gave it a good bath. Watch that Epic video here.
2. MY LENS.
I only have one macro lens now, the Olympus M. Zuiko ED 60mm f2.8. Sold the Panasonic Leica DG Macro-Elmarit 45mm f2.8 ASPH, MEGA O.I.S Lens after acquiring the Olympus lens. (What a mouthful!)
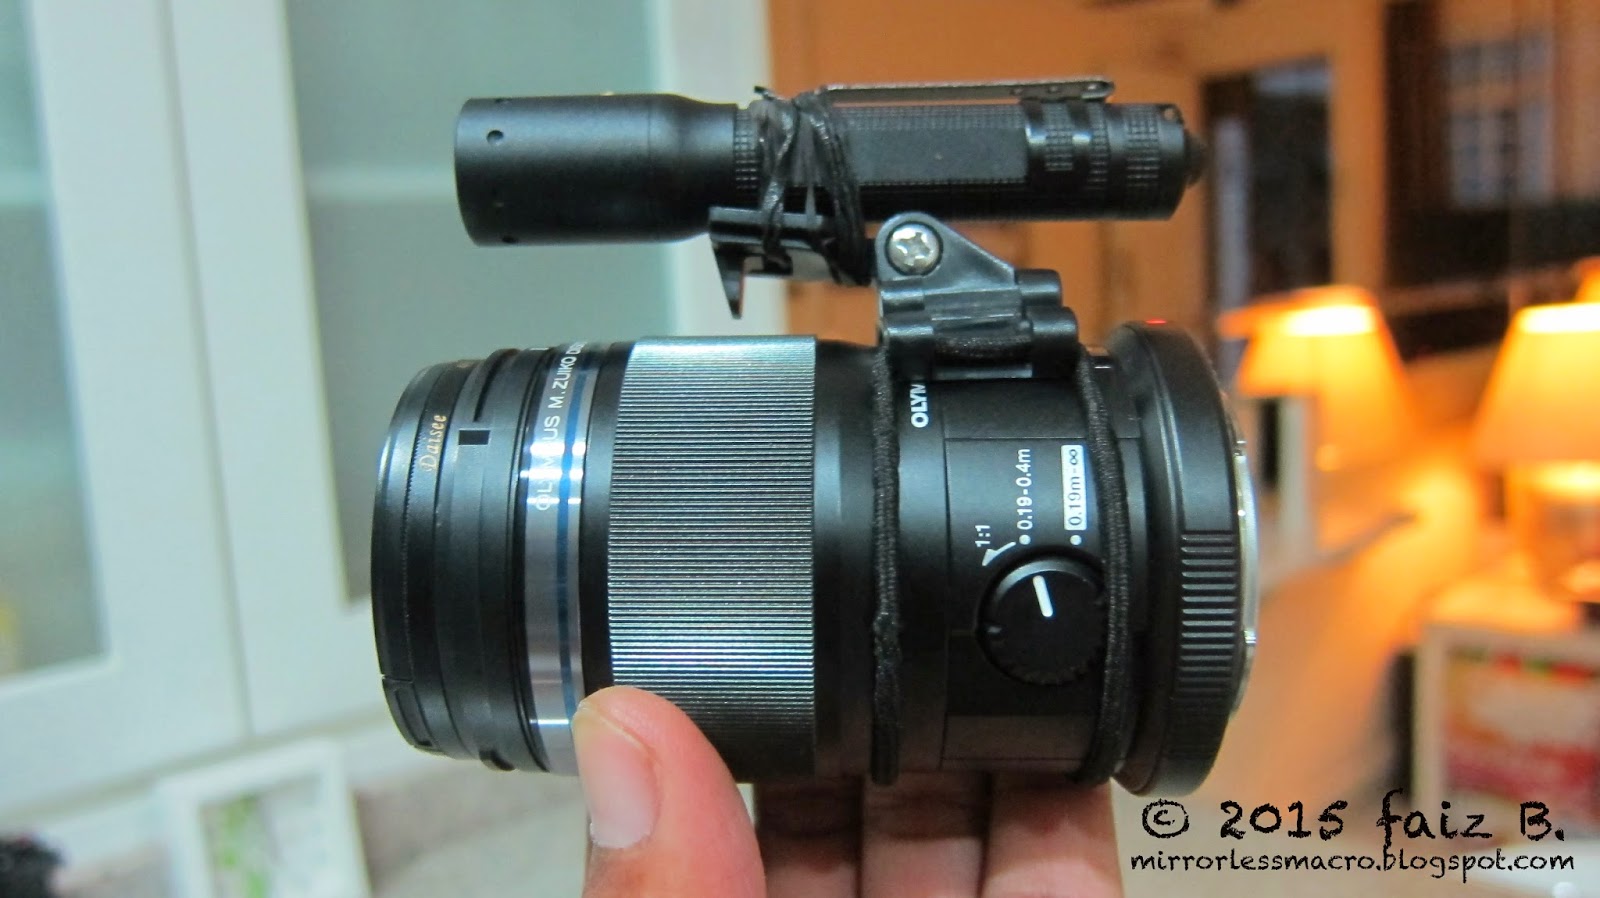
One of the best lens I have owned, hands down. Attached to the lens is a torchlight that I use to focus onto my subjects.
Key features that i liked about this Lens:
1) Weather-sealing: I am constantly exposed to the elements so having a weather-sealed lens helps to keep my mind at ease. What is the point of having an awesome weather-sealed camera body if the lens isn't?
2) It is ridiculously TINY. It is known to takes stellar photos but Image Quality is not what I


To achieve these shots, I held my flash (Olympus fl-600r) in one hand, pointing it directly behind the subject while holding the camera in the other, wirelessly triggering the slave from the onboard flash (fl-ML2). I probably would have fatigued quickly if not for my lightweight equipments. For more on this awesome lens from Blunty , click here.
3. FLASHES
I have 3 units, the Olympus fl-LM2, the Olympus fl-14, and the Olympus fl-600r.

Olympus Fl-LM2 that comes bundled with the OMD EM5.

The Olympus Fl-14... Sleek!

Back view of the Fl - 14.

The most versatile Olympus flash ever, the Fl-600r.

View from the back

My set-up without the diffuser.

The same set-up but with my DIY Diffuser. View from the side.

How it looks from the front.
With this simple set-up, I am able to achieve shots like these:

Banded Bullfrog (Kaloula pulchra)

An unidentified gecko.
4. MAGNIFIERS
To achieve greater magnification shots, I used the Raynox DCR-250 conversion Lens and an Extension Tube.

Some Cheapo Chinese-Brand Electronic Extension Tubes. Worked well for me.

Raynox dcr-250, a very useful clip-on magnifier that i use to get higher magnification shots.
Some results from these add-ons:

Arks cf. alatus; 10mm. And yes, it is a spider!

A tiny Asilid perched on a branch slightly thicker than a matchstick. (<5mm)

Close-up of an Epeus flavobilineatus!

A tiny jumping spider, probably a Carrhotus sp. we found on a Frangipani plant. (8mm)

Harmochirus sp. with prey. This Jumper has a legspan of less than 5mm!
This is, in my opinion, the most important part of the set-up. Having an ineffective diffusion is akin to having Toyota brakes on a Ferrari, you are compromising on control. Pretty weird analogy when talking about camera set-ups but think about it - You can have all the features that you dream of having in a camera, lens, or flash but without proper control of the lighting i.e. diffusion, the image will almost always fall flat. I engage different layers of diffusion materials depending on the light-reflective nature of my subjects. There is so much to talk about this seemingly simple topic that it deserves an entry of its own.
I will talk in greater detail about my diffusion methods in future posts so do stay tuned! I hope that you found this useful especially if you're still exploring on which camera or system to get. If you ask me, it is certainly possible to take very decent shots with a Micro 4/3 mirrorles system.
UPDATE: 1) To learn more about my diffusion techniques and flash set-up, click here.
2) To learn more about my backlighting techniques and equipment set-up, click here.
I just purchased an OMD EM5 M2 and the M. Zuiko 60 mm lens. Thank you so much for sharing the information about your set up! Can you tell me what you used to secure your torch light? Thank You!
ReplyDeleteHi! I use a torchlight holder meant for bicycles. I secure it onto my lens using a hair band. There are many ways to do it but do make sure that you stay clear of the focusing ring.. Have fun with your new gear!
DeleteHi could you advise if these look ok, I seem to get a softspot in the centre sometimes, any ideas.... One of them is the high detail,shot from th EM5II I'm using the 60mm zuiko. Any specific settings on the cam in the noise reduction area I need on or off?
ReplyDeletehttps://www.flickr.com/photos/50239774@N07/shares/9odQ1j
Thanks
Hi lovely photos
ReplyDeleteI also wanted some advice sorry if I'm double posting it doesn't seem to be going up.
ReplyDeletehttps://www.flickr.com/photos/50239774@N07/shares/9odQ1j
I did these tonight light wasn't great, but I sometimes get a softspot in the centre, I'm using the EM5 II and 60mm zuiko anything I'm doing wrong, or any settings I need to set on the camera in noise reduction etc.
Thanks
Hi! I just came across your comment.. apologies for this late reply!
DeleteI have looked through your photos. Were you shooting in auto mode? 4000 is a very high ISO even for natural light photography. For flash photography i use the native ISO which is 100 and with ambient light, i rarely go higher than ISO 400. Any photos taken with the flash?
Mirrorlessmacro
Hi Mirrorlessmacro,
ReplyDeleteLoving the site.
Very new to all this and would really like some advice.
Shooting with an OMD-10 and a M. Zuiko ED 60mm f2.8. Really love the set up but struggling with the lens for hand held macro shots.
The OMD-10 has a built in flash. Do you think this flash with some diffusion will provide decent results, or will it still give me lens shadow? Would I be better off with an FL-14?
Minimising the gear is a big thing for me!
Any advice would be very grateful.
Thank you :)
Hi Sam. Glad you enjoyed my site. You mentioned that you are struggling to shoot handheld - I am quite perplexed with this since the OMD + 60mm combo is one of the easiest to handheld! What were the issues, care to share please?
DeleteThe built in flash is okay for close-up work just make sure that you diffuse the lighting. I am currently testing out a new flash, the Meike mk320, and despite the low price-point, i was very pleasantly surprised with the results. Unlike the fl-14, it has wireless capabilities and uses AA batteries instead. Therefore I would recommend that you go for this flash instead. There you go, fresh tip from field-testing! :)
Thank you for your reply!
ReplyDeleteI just find that with ambient light it blurs, and if I increase the ISO to a point where its fast enough, it's grainy and disappointing.
I shoot a bit with a Canon DSLR macro lens and ambient light and got some great results, so I don't know why its different now.
Any ideas?
Will definitely look into Meike mk320! Thank you for the tip.
Hey! Is the camera setting (EXIF) and conditions the same when shooting with a DSLR? You have to take into consideration the sensor size on the OM-D and the X2 crop factor at play. f5 on the EM10 is equivalent to f10 on a Full-frame.
DeleteHope things are good with you.
DeleteI will have another play and see what I can do. Alas I no longer have the DSLR macro set up so I cannot compare.
What settings do you suggest I try for test shots at 1:1 in good light? Really grateful for your help - just starting out on macro and M4/3 so a bit in over my depth. :)
Hmm I would suggest shooting at between 1/80-120s, f8-11, at native iso of 100. If it is too dark, do not change the ISO. Instead play around with the shutter speed and aperture. I am assuming that you will be using a diffuser because without one, there is no way the light is going to reach the subject. Hope this helps. :)
DeleteHi!
DeleteThank you I'll try that. Do you mean a diffuser for the flash? What about if I use the ambient light - or do you think that will give me blurry results if handheld?
Yes, the setting I have you is for flash photography. How close to the subject do you intend to get with natural light? Not a good idea to do high Magnification work without a flash.
DeleteHi,
ReplyDeletegreat shots! I'm addicted to macrophotography, my equipment is dslr with macro lenses, tubes, old lenses for reversed macro, diffusors etc. I just was thinking about something smaller, to be capable to do macro almost everywhere, not need to carry all the equipment. I read about different mirrorless cameras and Olympus OMD was in my top dwo, but still I wasn't sure if small camera will do the trick. You have confirmed it do. Although I was thinking about E-M10 II, now i have to check my budget one more time:) Thanks for superb, inspiring blog! Greetings, Kate
Hey Kate! Thank you so much for your lovely comments! EM10 II is a great camera. You will do good with that. All the best! :)
DeleteWOW, some absolutely amazing shots. Your information is just what I need. Eventually I want to get into macro but have to pay off my newest acquisition: Olympus OMD 5II. I am a Nikon user, but recently rented the Oly and fell in L O V E!!! So much lighter than my Nikon full frame. Color is great too. So next step would be to do some macro. Just one question...can you share how you made your DIY diffuser? Again thanks for sharing your photos. They are beautiful!
ReplyDeleteHi S. Laflamme.. thanks! Glad that you liked the photos.. More importantly, I am glad that you fell in love with the Oly Em5 mark 2! It is a great camera.. as for the DIY diffuser, i will be making a tutorial video pretty soon so please watch this space.
ReplyDeleteLove,
Faiz B.
Great photos Faiz. I too have an OM-D E-M1 and Oly's 60mm f2.8 macro lens. Can you confirm you get better magnification with the extension tubes ? I've looked at Oly's EX-25 tubes and nowhere does Oly say they're compatible with the 60mm f2.8. By any chance do you have suitable images (eg an insect's eye) with and without the tubes ?
ReplyDeleteMany thanks,
David.
Thanks. There are quite a number of aftermarket brands of ET for the em1. I use a brand called Viltrox (with electronic connections) although to be honest, I seldom use ETs anymore, now that I have the Raynox msn 202. The problem with ET is that It cuts out too much light. I find it easier to use a Raynox instead. Will post some pics soon. Cheers
DeleteHi, I have recently acquired the 60mm, FL-14, and the Raynox 250 based on your recommendations. I am an eternal amateur and have absolutely no experience using flash. Would you please be able to tell me the flash settings you used when using the FL-14 (both flash and camera settings)? Thank you in advance.
ReplyDeleteBen
Hi Benin,
DeleteGlad to have you onboard! I am currently using a different flash, the Meike MK 320. Settings are the same for the FL-14: ETTL almost all the time, Exposure Value depends on the subject I'm shooting. Camera EXIF differs from subject to subject but generally I keep my Shutter speed between 1/60s to 1/125s, Aperture F9-13, with base ISO of 100. Hope this helps.
Faiz B.
Hi
ReplyDeleteLove the site and am just getting into this. Will look into the Meike MK320 and the Raynox 250. Could you please talk a little bit more about the focus light you seem to have attached to your camera? Also have you tried any of the apurture led lights, which give out continuous light. There are some pretty small but powerful units there and I wonder if they would work well?
Hello! It is basically a small torchlight that i attach to my lens with a velcro strap. I am not a big fan of led lights because you would probably have to bump up the ISO and in the process, add noise to your photo. You'd probably have to open the shutter longer than usual and depending on what you're shooting (lets say a spider that moves all the time), you'd almost guarantee a blurry shot. LED light would work only if you shooting on a tripod of a stationary subject in a studio environment. No-no for handheld work out in the field . :)
DeletePresumably this is because of the LEDs low output compared to flash?
DeleteGreat informational blog and awesome images. Some slight corrections. The fly you have labeled 'tiny Asilid' here (and on your Queensland blog entry) is actually a hybotid (or hybotine empidid depending on who you talk to). Also Arkys is misspelled on this page (Arks).
ReplyDeleteThanks! I will correct them accordingly :)
DeleteWow! There is so much amazing work here! And so much useful information. I usually use the Olympus to shoot macro underwater photography but I would like to try some of these techniques.
ReplyDeleteDo you ever shoot faster than the 1/250th flash sync limit? Thanks?
Bogdan
Hi I had the 60mm macro but sold it as I could never get the focus right.It always appeared to be hunting.Have you had this problem
ReplyDeletei hav found with the 60mm macro it is very difficult to focus.So much so that I sold it.It kept hunting between the various settings
ReplyDeleteYou have to set the range correctly with the button on the side. Also, it will hunt if you don't have enough light to focus with hence the use of the LED penlight.
DeleteSome great shots, Congratulations on the excellent work. You mentioned in one of your comments about how the subject was moving in the breeze. This is my biggest challenge when attempting macro shots, unable to get the focus I want with the moment caused by the breeze, be that spiders on their web or even flowers. Any suggestions?
ReplyDeleteHi Faiz, Great blog! I've started shooting moths at night and found I definitely need a small flashlight attached to my rig. I have a similar setup as you with an EM1 Mk II and the Oly 60mm macro. I just ordered the Flashpoint/Godox zoom mini (because I may eventually get other flashes of the same brand). I studied your setup and will be replicating it. But I cannot find a bike light that is small enough to work with an adjustable swivel. Isn't it true that the light should not extend further than the lens (in my case only about 3.25 inches or 8.25 cm). I can find flashlights that small but not with a swivel. It looks like you had to cut up your swivel and use hair bands to hold it in place, and I'd be willing to do that but its hard to find a small enough flashlight with a swivel. Does it matter if the flashlight is LED? Thanks.
ReplyDeleteThanks, David. Yup, try not to get a flashlight longer than the lens. Other than that, don't worry too much about the type of flashlight or if it comes with a swivel; just as long as it works! You could either attach the light directly onto the lens or the diffuser. Try to get a smaller flash for the obvious reason that it is lighter. Hope this helps.
DeleteHi.. ! What an amazing site, there's so much of informations and to learn. Thanks brother. I'm new to macro photography and recently have fallen in love with Olympus OD EM series. I would like to know if there's any differences in image quality between EM 5 and EM 10. Looking forward for your response. Thanks
ReplyDeleteHello there! Thanks for the feedback! I don't think there are any negligible differences in image quality between the EM5 and EM10, even EM1 for that matter. So go for it! :)
DeleteHi mate. I would like to know if EM mark iii will produce same image quality as EM mark ii for macro photography when used with M zuiko 60mm macro . Please let me know..thanks
ReplyDeleteHi! You mean the EM1 mark 1 vs the EM Mark 2?
Delete