Backlighting macro is a style of macro that emphasises on the light (from the slave flash) coming from behind the subject creating a distinction between the subject and the background, be it a flower, or in my picture below, a pseudoscorpion with its giant prey.

Why backlighting?
There are many reasons to backlight a subject but personally, these are my 2 main reasons.
1) To accentuate the physical characteristics of what i am photographing, that would otherwise be less distinct when taken normally. For instance, in this backlit photo, you can clearly see the venation of the butterfly wings.

2) To evoke a sense of surrealism in a photo - it transforms an otherwise common subject into something unique, further challenging how we normally interpret and appreciate the beauty of mother nature.
I have always enjoyed the work of my fellow macro comrades, especially those produced by Melvyn Yeo, a fellow Singaporean. What differentiates him from the rest are his backlighting photos.

One of my personal favourites. (Used with Permission. All rights reserved
© Melvyn Yeo)
You can view more of his amazing work here. I particularly enjoyed his backlighting macro photos and how he is able to evoke a sense of surrealism through his work merely by manipulating light. While I had the opportunity of joining him and his group during one of their sessions, I was not able to witness his backlighting techniques firsthand and so, armed with my gears and guided by blind faith, I set out on my own to embark on a learning journey to try and recreate and further improve what I've seen.
Below is my first ever backlighting shot that I was truly happy with, after exhausting one camera battery and a set of flash batteries during my first ever experimental attempt.

While it was far from perfect, I was over the moon! Subjects that were common suddenly appeared different. I was completely hooked. Over time, I was able to develop my own style and techniques through trial and error, and a little bit of luck.
In my own quest to learn backlighting, I find that there were not many sites dedicated to this style of macro photography, hence the birth of this post, aimed to help other macro photographers expedite and shortcut their learning curve.
I will be dividing this into 4 parts.
A) THE GEARS
B) THE INITIAL PROCESS
C) TECHNIQUES AND DESIRED EFFECTS
D) CAMERA SETTINGS
Without further adieu, lets begin!
A) THE GEARS
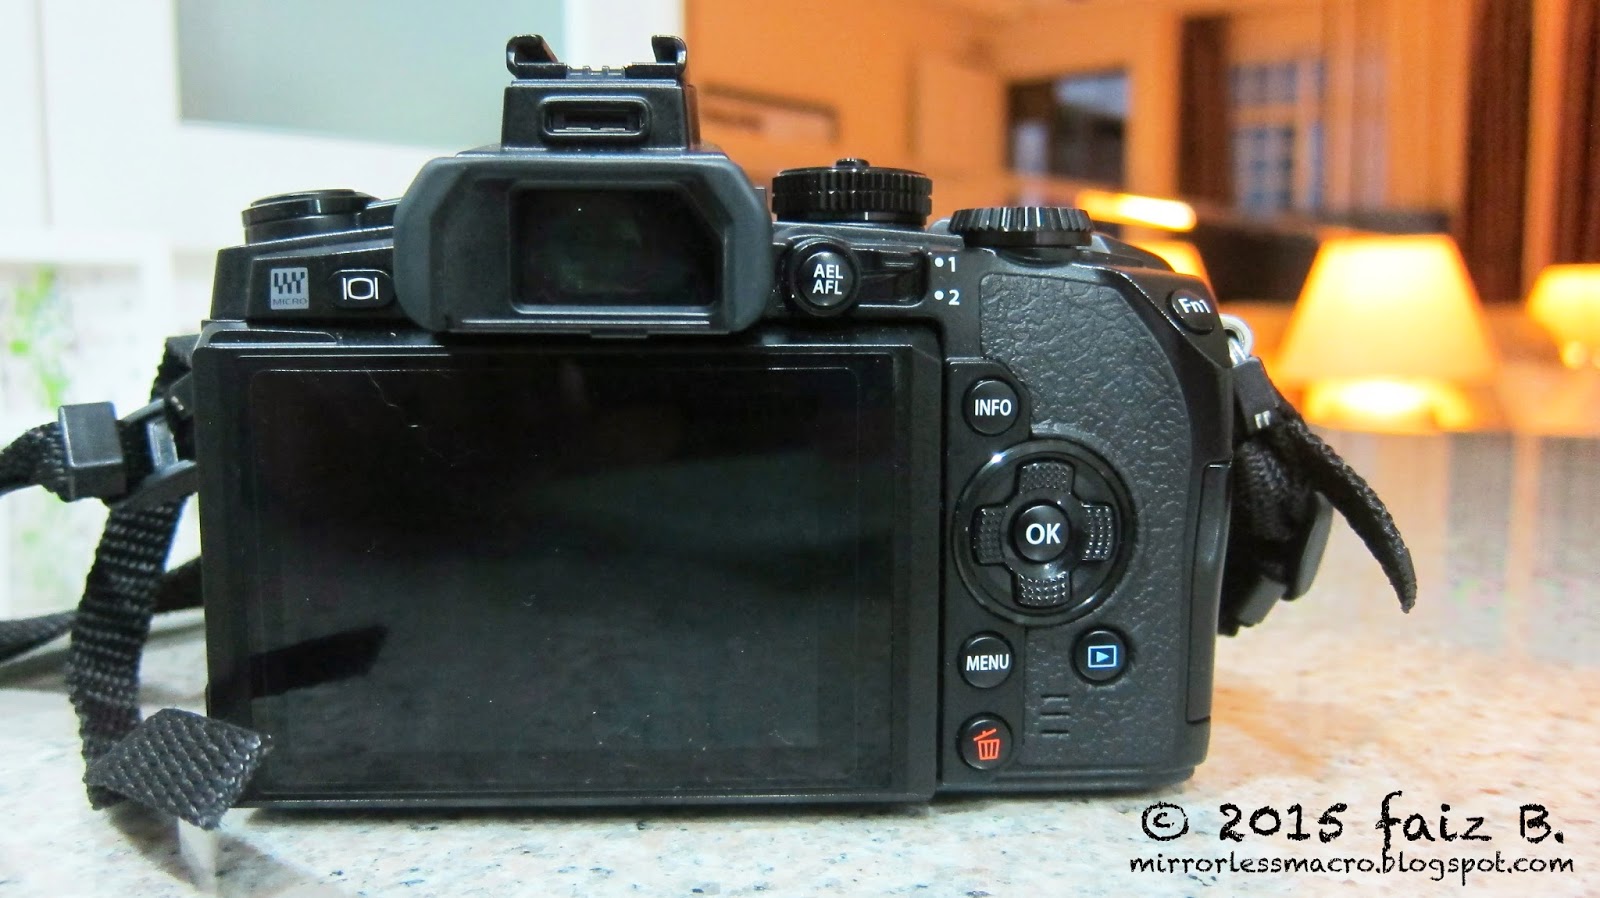
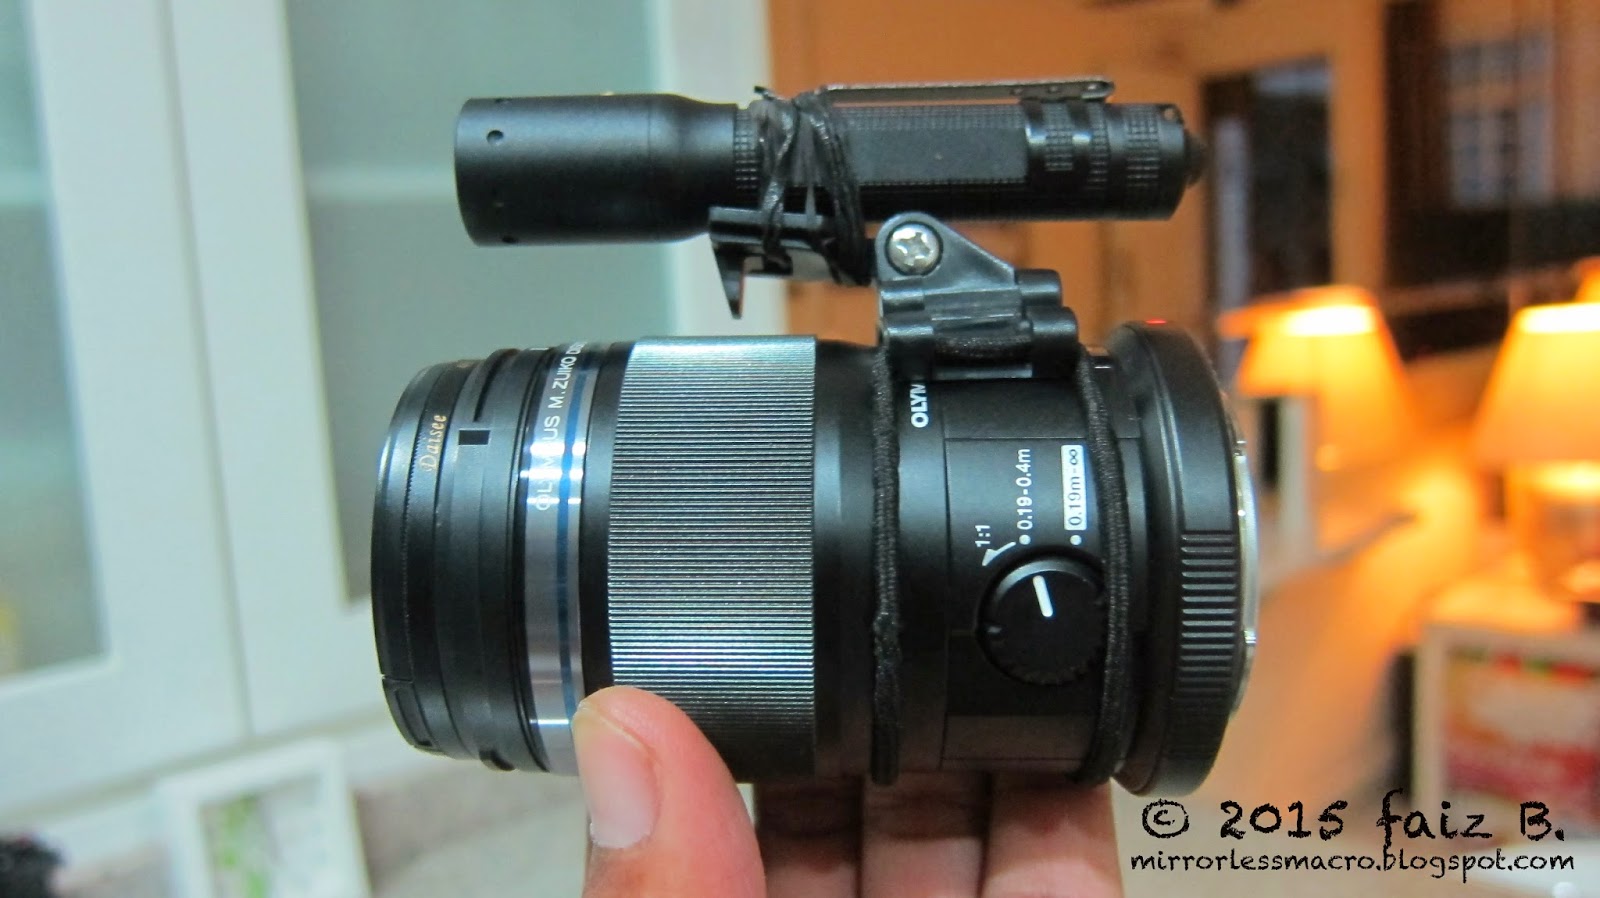
I shoot with a small and lightweight mirrorless system camera, and this allows for greater flexibility in how I position my gears and compose the shots during my solo in-situ sessions. I was able to hold the camera in one hand, the secondary flash in another, and shoot away without having to worry about fatigue or space constraint.
My set-up is pretty straightforward - my main camera body is the OMD EM1 with an Olympus 60mm macro lens. For subjects smaller than 5mm, I use a Raynox dcr-250. For anything smaller than 2mm, I use the Raynox msn-202 conversion lens.
As for lighting, I use the Olympus fl-600r and Olympus fl-14 flashes. The latter is used as a master trigger for the fl-600r. And of course, a DIY reflector is almost a must-have.
For more information on these gears, please read my blog entry here.
B) THE INITIAL PROCESS
There are literally dozens of ways you can backlight a subject. Personally, I am guided by the following thought processes before executing a shot.
1) What emotions do I want the image to portray?
2) What are the physical or environmental limitations (e.g, subject too reflective, background blocked by a bush, etc) that would prevent me from achieving the desired effect?
3) Where on the subject, should the emphasis be?
4) What are the tools i need to get the job done?
Four very simple yet often-overlooked questions that we should be asking ourselves more frequently, not just in macro photography but in all photography disciplines. By adopting these steps, I find that I was able to be more deliberate in my actions - imagining how the photos would turn out before pressing the shutter button and choosing the right gears to execute the job.
C) TECHNIQUES AND DESIRED EFFECTS
These techniques may be used separately or layered together, depending on the overall effect that you desire.
i) Effect No. 1: The Basics.
Darkened background and foreground with rim light outlining the subject.

Example 1

Example 2. Is it possible to backlight really tiny subjects? Yes! Here is an Owlfly larvae that is only 4mm in length. Parts of the Owlfly is translucent, allowing some light to penetrate through.

Example 3. Another variation - Higher contrast between light and dark regions with broken silhouette is achieved by undiffused backlighting. For a less contrast and less harsh result, you may want to attach a soft box onto your flash.
Some tips and tricks to consider:
1) Would the light be able to pass through the subject and the medium that it is resting on (leaf, stick, etc), when shot at the desired angle?
If the answer is Yes, then consider reducing the exposure compensation of the camera/flash. You might also want to soften the light by attaching a diffuser onto the flash or position the flash further away from the subject. This is particularly important if you're shooting really tiny subjects. See example 2.
2) Ensure that the flash is NOT directly pointed towards the camera as it would result in flaring. Instead, position the flash at an angle towards the subject. Remember: How you angle the flash is depended upon the area of the subject that you want to emphasise.
3) Check your environment - Ensure that there is nothing between the camera and the subject, or directly behind you with considerable surface area that would reflect the light back onto the subject, inadvertently illuminating it from the front.
4) Ensure that your secondary flash (the one placed behind the subject) is stronger than your trigger flash (onboard).
5) Deploy the use of a Lens Hood to block off any stray light from entering the lens.
ii) Effect No. 2: Subtle backlighting.
Both background and foreground are lit to allow greater visibility of detail on the subject from the front.

Example 4. With diffused backlighting.

Example 5. With diffused backlighting.

Example 6. My most recent backlighting photo, taken just yesterday! The egg sac was illuminated by a large reflector positioned on top of the lens.

Example 7. A slight variation with a much brighter background. Backlighting was left undiffused.
Tips and tricks to consider:
1) For example 4, 5 & 6, the backgrounds are completely dark. This was achieved by ensuring that there is nothing behind the subject to reflect the light towards the subject.
2) For example 7, I placed a piece of dried leaf directly behind the subject to allow some light to bounce on it thus creating a brighter background.
3) For all 4 examples, I placed a white foam (or any reflective medium) above the lens to bounce all available light back onto the subject, thus capturing better detail on the subjects from the front.
4) Use a Gold-colored reflector if you're looking to produce warmer tones.
5) Deploy the use of a Lens Hood to block off any stray light from entering the lens.
iii) Effect No. 3: "A Beautiful Mess."
Using the light from the flash to create a flaring effect; best achieved when the flash head, subject and camera sensor are parallel to one another.

1) Remove the lens hood. You definitely would want some light in! Do ensure that you have a UV filter on to protect the sensor.
2) Angle the flash directly behind the subject, pointing the flash head directly towards the lens.
3) If you have the Live View feature on your camera, use it as you would not want to look through the viewfinder when the flash fires.
iv) Effect No. 4: Shadow & Silhouette.
This effect is best achieved with subjects that are translucent, which would allow light to penetrate through, creating beautiful shadows and silhouettes.


Some tips and tricks to consider:
1) When choosing a leaf, find one with an interesting pattern. Experiment with different coloured leaves.
2) Both sides of the leaf have different colour tones. I personally prefer to have the "underside" of the leaf facing the lens as I set off the flash from behind the subjects.
D) CAMERA SETTINGS
There is no "one-size-fits-all" approach to this. Personally, I keep my settings the same just as I would during 'normal' macro photography. I merely manipulate the lights.
1) Shoot in manual mode. For most of my shots above, I generally keep my shutter speed between 1/125th and 1/250th of a second. I generally do not shoot with a tripod, mostly handheld so a fast shutter speed is needed.
2) As a general rule of thumb, keep the aperture large if you want minimal light. For the exact opposite results, dial to a smaller aperture.
3) Switch your metering mode to "spot-metering" if you wish to to keep your background brighter than the foreground. See example 10.
4) If you wish to keep both background and foreground equally bright, switch your metering mode to "evaluative-metering". Alternatively, keep the metering mode to "spot-metering" and engage the use of a (large) reflector instead. I personally prefer to keep my metering to "spot" most of the time and use a reflector.
5) Keep to your native ISO, which is the lowest ISO available. Don't worry, there will be plenty of light in this type of photography!
6) Assign your camera's exposure compensation setting as a short-cut button. You would be using this function regularly.

My attempt at backlighting a Planthopper (Singapore). Notice that i used a tiny onboard flash to trigger the much larger off-camera flash in my left hand, which has been diffused with some packing foam wrapped round the flash head.

Shot in Raya Island, Thailand!
--------------------------------------------------------------------------------------------------
4) Use a Gold-colored reflector if you're looking to produce warmer tones.
5) Deploy the use of a Lens Hood to block off any stray light from entering the lens.
iii) Effect No. 3: "A Beautiful Mess."
Using the light from the flash to create a flaring effect; best achieved when the flash head, subject and camera sensor are parallel to one another.
Example 8
Some tips and tricks to consider:1) Remove the lens hood. You definitely would want some light in! Do ensure that you have a UV filter on to protect the sensor.
2) Angle the flash directly behind the subject, pointing the flash head directly towards the lens.
3) If you have the Live View feature on your camera, use it as you would not want to look through the viewfinder when the flash fires.
iv) Effect No. 4: Shadow & Silhouette.
This effect is best achieved with subjects that are translucent, which would allow light to penetrate through, creating beautiful shadows and silhouettes.
Example 9
Example 10 - Layering this technique with the "basics". Frog remained unlit from the front when reflector (on top of the lens) is removed to prevent light from flash bouncing back onto it.
Example 11
Some tips and tricks to consider:
1) When choosing a leaf, find one with an interesting pattern. Experiment with different coloured leaves.
2) Both sides of the leaf have different colour tones. I personally prefer to have the "underside" of the leaf facing the lens as I set off the flash from behind the subjects.
D) CAMERA SETTINGS
There is no "one-size-fits-all" approach to this. Personally, I keep my settings the same just as I would during 'normal' macro photography. I merely manipulate the lights.
1) Shoot in manual mode. For most of my shots above, I generally keep my shutter speed between 1/125th and 1/250th of a second. I generally do not shoot with a tripod, mostly handheld so a fast shutter speed is needed.
2) As a general rule of thumb, keep the aperture large if you want minimal light. For the exact opposite results, dial to a smaller aperture.
3) Switch your metering mode to "spot-metering" if you wish to to keep your background brighter than the foreground. See example 10.
4) If you wish to keep both background and foreground equally bright, switch your metering mode to "evaluative-metering". Alternatively, keep the metering mode to "spot-metering" and engage the use of a (large) reflector instead. I personally prefer to keep my metering to "spot" most of the time and use a reflector.
5) Keep to your native ISO, which is the lowest ISO available. Don't worry, there will be plenty of light in this type of photography!
6) Assign your camera's exposure compensation setting as a short-cut button. You would be using this function regularly.
My attempt at backlighting a Planthopper (Singapore). Notice that i used a tiny onboard flash to trigger the much larger off-camera flash in my left hand, which has been diffused with some packing foam wrapped round the flash head.
Shot in Raya Island, Thailand!
--------------------------------------------------------------------------------------------------
Thanks for reading and I do hope that you find this blog entry informative and useful. Please feel free to leave your comments and feedback in the comments section below. If you have your own techniques and tips that you would like to share, please do. I would love to learn from you as well!