Showing posts with label lenses. Show all posts

Sunday, 19 April 2015

Macro Diffusion for the Mirrorless Camera system

.... Continuation from my previous post on the types of Equipment I use.

The truth is, most modern cameras and lenses that are available out there in the market, regardless of the system, are more than capable of achieving good if not great macro images on its own merit. Having said that, then why are our photos failing to deliver desirable results, time and time again? More often than not, it probably has to do with Lighting, or to be more specific, the lack of Proper Diffused Lighting. This is the one most important aspect of (macro) photography that would be the differentiating factor between mediocre, good, and great photos.

Before I begin, I would like to gently remind that there is no one-size-fits all solution when it comes to lighting - Every subject matter and shooting environment comes with its own set of inherent challenges and it is up to us to manipulate the lights to create the most pleasing results, so do not be afraid to experiment. Just to be clear, henceforth, I will be discussing solely on TTL fill-flash and not natural-light photography, and since this is a site dedicated to the mirrorless system, I will approach this topic from that angle, although I can assure you that most of the points that I will be covering stand true for DSLRs as well.

1) What is considered a Properly Diffused Lighting?

An ideal diffusion of the fill-flash would result in the even distribution of the light from the flash to the subject, minimising any hotspots or shadow spots by wrapping light around the subject matter(s).

A clear illustration would be:

Imagine that you are photographing a ping pong ball. A properly diffused lighting would be able to
reach all if not most of the surface area of the ball with the right and even exposure.

A properly diffused lighting should also be able to solve or alleviate these problems:

a) Subject matter with odd shapes and shiny, reflectives surfaces.

This Cosmophasis sp. jumping spider would be the ideal example of a difficult subject to photograph. It is tiny (5mm) and highly reflective, especially the eyes!

b) Poor distribution of light; Focused on just one or more scattered spots.

Pls excuse the extremely graphic use of Microsoft Paint but you get my point.
2) What are some of the considerations to take note of when aiming for a Proper Diffusion?

a)  The design specifications of your mirrorless system (Mirrorless systems have a much shorter distance between flash head and front of lens as compared to a regular DSLRs, due to its smaller size)
b)  The Guide Number (GN) or power of the flash
c) The types of materials that you can use as diffusion and the appropriate amount of layers.
d) Wastage of light due to light leakage.

Lets us dwell deeper into point (a) and (b) for a bit before moving on to the other points in just a while. It seemed like what lured me to the mirror less system in the first place was also a source of my initial problems - its  size. As we all know, most mirrorless systems are tiny and if you recently made the switch from a DSLR where the mantra seems to be 'the bigger the flash, the better', it takes a lot of getting used to. Just remember that this is not the case when it comes to a mirrorless system, as a matter of fact, it is the exact opposite!

3) How to choose the right flash for your type of macro work.

Factor of exponents and Guide Number

When choosing a flash for your mirrorless camera, resist the temptation to go with the biggest flash you can find. Instead, choose a flash based on its Guide Number that is appropriate for the length of the lens in terms of providing the right exposure when shooting a subject at your preferred shooting/working distance. In general, the higher the Guide Number of the flash, the more powerful it is. The question is then, what would be the minimum GN needed for my close-up shots? The answer is in this formula:

GN (guide number) = f-stop number X Distance (flash to subject)

So let's say that the distance (flash head to subject, not front of lens to subject) of my macro lens (M. Zuiko Digital ED 60mm f/2.8)  for my 1:1 magnification shots is approximately 30cm at a f-stop number of 11 (full format equivalent of f22 due to X2 crop factor) and with an ISO of 100. So by applying the formula, the minimum Guide Number needed for a correct exposure at these settings is:

GN (guide number) = f22 X 0.3meters
                                = 6.6metre or 21.6 feet

What does these numbers above means to you and me? To give you a point of reference, my smallest flash, the Olympus fl-LM2, that comes with free with the OMD EM1, has a guide number of 7 meters (22 feet) so what this simply means is that, technically, this flash is sufficient for my 1:1 magnification shots - the bare minimum GN needed to correctly expose my subjects at a distance of 30cm. Of course, this is not ideal especially when I am shooting larger subjects at a much lower magnification, and that is why I decided that the default flash simply won't cut it for my type of macro work.

The Olympus fl-LM2 with a GN of 22 (feet). Sorry for the lousy IQ, taken with a mobile phone.
Probably not ideal flash for larger subjects like this Agamid, due to the low GN.
In a nutshell, the main points that I want to bring across are:

a) Be aware of your preferred settings for the usual group of subjects that you photograph often (eg. f11 for beetles smaller than 5mm at a working distance of 10cm or f5.6 for a large lizard at working distance of 50cm, etc).

b) Choose a flash with the appropriate GN. The larger the GN, the larger the flash usually is in terms of size and relative power. Remember; you are shooting close-up photos of insects and not birds high up on trees so don't overkill it.

The Olympus fl-14 with a GN of 46 (feet). I decided on this flash due to its relative high GN and low-profile design.
The Olympus fl-50r with a GN of 146 (feet)! Too big and powerful for my type of work.
I figured that the Olympus fl-14 (GN 46) has more than sufficient power for my type of macro work. Putting on the Olympus fl-50r (GN 146) would be an overkill for me, plus it is way too big for my liking. I prefer to keep it small and light!

4) Suitable materials for Diffusers

There are many materials out there that would be suitable for macro work although I have my preference. Some of the more common materials:

a) Tissue towel
b) styrofoam
c) Packing foam
d) tracing paper
e) Thin translucent sheets of plastic

I have experimented with all the above, even layering some of them in creating some of my own diffusers. Most of them are pretty good in terms of the overall results although realistically, some would not last 30 minutes out in the field, given the wet climate conditions where i live. The other considerations apart from durability would be the flex-rate and of course, the actual light-distribution capability of the material. After taking into account all of my pre-requisites, and after months of testing, I finally decided to settle on packing foam as the base material for my diffusers.

5) How many layers is appropriate?

This depends on the Guide Number of your flash. The stronger your flash, the thicker the diffuser must be. I personally engage just one main diffuser, fitted around the lens, for less reflective or larger subjects. For rounder or very shiny, reflective subjects, I would insert another layer in between the flash and the main diffuser. The idea here is to spread the light as much as possible so the further the diffuser is away from the light source, the better. Remember, the purpose of the diffuser is not to cut out the light but rather to spread it across a larger surface area.

Main Diffuser with 4 layers of thin packing foam spray-glued together.
Phaeacius cf. malayensis with single diffuser.

For more reflective subjects, I insert an additional layer of foam between the reflector and the main diffuser.
A pair of Dipterans with dual layer diffusion.
7) Reflectors

A reflector is basically any flat object, preferably made from a durable lightweight material that is placed directly over the flash head to direct the light towards the diffuser.Having a good reflector would prevent the leakage of valuable light, especially if you are settling for a smaller flash with a lower GN. I have experimented with various store-bought and DIY designs and I find that the store-bought ones are pretty much useless in terms of light distribution and usability so I prefer to make my own.

Some considerations when making your own reflector.

1) Choose a dark coloured reflector, preferably black and avoid translucent or tinted materials as it would end up throwing coloured lights onto the subject and the surrounding scene.

2) Line the inside of the reflector with aluminium tape. Avoid making the mistake of scrunching up the aluminium tape before applying it - this would only scatter the light. You don't want to scatter the light but rather direct it.

3) Think about how you can minimise light-leakage.

Version 2.0 - It can be completely flat-packed for easy storage!

Ready to roll!

There is certainly a lot of to talk about with regards to the topic of diffusion but I reckoned this short tutorial would be more than sufficient to assist you in designing your very own diffusers for your mirrorless set-up. Feel free to contact me here or on my personal Facebook Page should you have any further questions or suggestions for my future posts. Have fun experimenting and do remember that a larger flash does not necessarily mean that it the better choice, especially not for our tiny machines!

UPDATE (1 Nov 2016) : Click here to for a tutorial on how to make your very own Concave Diffuser!

Interested to learn backlighting and how to re-create shots like the one shown below? Click here to find out more!


Saturday, 28 March 2015

Backlighting Macro - All you need to know.

What is backlighting macro?

Backlighting macro is a style of macro that emphasises on the light (from the slave flash) coming from behind the subject creating a distinction between the subject and the background, be it a flower, or in my picture below, a pseudoscorpion with its giant prey.


Why backlighting?

There are many reasons to backlight a subject but personally, these are my 2 main reasons.

1) To accentuate the physical characteristics of what i am photographing, that would otherwise be less distinct when taken normally. For instance, in this backlit photo, you can clearly see the venation of the butterfly wings.


2) To evoke a sense of surrealism in a photo - it transforms an otherwise common subject into something unique, further challenging how we normally interpret and appreciate the beauty of mother nature.

I have always enjoyed the work of my fellow macro comrades, especially those produced by Melvyn Yeo, a fellow Singaporean. What differentiates him from the rest are his backlighting photos.


One of my personal favourites. (Used with Permission. All rights reserved 
© Melvyn Yeo)

You can view more of his amazing work here. I particularly enjoyed his backlighting macro photos and how he is able to evoke a sense of surrealism through his work merely by manipulating light. While I had the opportunity of joining him and his group during one of their sessions, I was not able to witness his backlighting techniques firsthand and so, armed with my gears and guided by blind faith, I set out on my own to embark on a learning journey to try and recreate and further improve what I've seen.

Below is my first ever backlighting shot that I was truly happy with, after exhausting one camera battery and a set of flash batteries during my first ever experimental attempt.


While it was far from perfect, I was over the moon! Subjects that were common suddenly appeared different. I was completely hooked. Over time, I was able to develop my own style and techniques through trial and error, and a little bit of luck.

In my own quest to learn backlighting, I find that there were not many sites dedicated to this style of macro photography, hence the birth of this post, aimed to help other macro photographers expedite and shortcut their learning curve.

I will be dividing this into 4 parts.

A) THE GEARS
B) THE INITIAL PROCESS
C) TECHNIQUES AND DESIRED EFFECTS
D) CAMERA SETTINGS

Without further adieu, lets begin!


A) THE GEARS

I shoot with a small and lightweight mirrorless system camera, and this allows for greater flexibility in how I  position my gears and compose the shots during my solo in-situ sessions. I was able to hold the camera in one hand, the secondary flash in another, and shoot away without having to worry about fatigue or space constraint.

My set-up is pretty straightforward - my main camera body is the OMD EM1 with an Olympus 60mm macro lens. For subjects smaller than 5mm, I use a Raynox dcr-250. For anything smaller than 2mm, I use the Raynox msn-202 conversion lens.

As for lighting, I use the Olympus fl-600r and Olympus fl-14 flashes. The latter is used as a master trigger for the fl-600r. And of course, a DIY reflector is almost a must-have.

For more information on these gears, please read my blog entry here.


B) THE INITIAL PROCESS

There are literally dozens of ways you can backlight a subject.  Personally, I am guided by the following thought processes before executing a shot.

1) What emotions do I want the image to portray?
2) What are the physical or environmental limitations (e.g, subject too reflective, background blocked by a bush, etc) that would prevent me from achieving the desired effect?
3) Where on the subject, should the emphasis be?
4) What are the tools i need to get the job done?

Four very simple yet often-overlooked questions that we should be asking ourselves more frequently, not just in macro photography but in all photography disciplines. By adopting these steps, I find that I was able to be more deliberate in my actions - imagining how the photos would turn out before pressing the shutter button and choosing the right gears to execute the job.

C) TECHNIQUES AND DESIRED EFFECTS 

These techniques may be used separately or layered together, depending on the overall effect that you desire.

i) Effect No. 1: The Basics.

Darkened background and foreground with rim light outlining the subject.


Example 1


Example 2. Is it possible to backlight really tiny subjects? Yes! Here is an Owlfly larvae that is only 4mm in length. Parts of the Owlfly is translucent, allowing some light to penetrate through.


Example 3. Another variation - Higher contrast between light and dark regions with broken silhouette is achieved by undiffused backlighting. For a less contrast and less harsh result, you may want to attach a soft box onto your flash.

Some tips and tricks to consider:

1) Would the light be able to pass through the subject and the medium that it is resting on (leaf, stick, etc), when shot at the desired angle?

If the answer is Yes, then consider reducing the exposure compensation of the camera/flash. You might also want to soften the light by attaching a diffuser onto the flash or position the flash further away from the subject. This is particularly important if you're shooting really tiny subjects. See example 2.

2) Ensure that the flash is NOT directly pointed towards the camera as it would result in flaring. Instead, position the flash at an angle towards the subject. Remember: How you angle the flash is depended upon the area of the subject that you want to emphasise.

3) Check your environment - Ensure that there is nothing between the camera and the subject, or directly behind you with considerable surface area that would reflect the light back onto the subject, inadvertently illuminating it from the front.

4) Ensure that your secondary flash (the one placed behind the subject) is stronger than your trigger flash (onboard).

5) Deploy the use of a Lens Hood to block off any stray light from entering the lens.

ii) Effect No. 2: Subtle backlighting.

Both background and foreground are lit to allow greater visibility of detail on the subject from the front. 


Example 4. With diffused backlighting.


Example 5. With diffused backlighting.


 Example 6. My most recent backlighting photo, taken just yesterday! The egg sac was illuminated by a large reflector positioned on top of the lens.


Example 7. A slight variation with a much brighter background. Backlighting was left undiffused.

Tips and tricks to consider:

1) For example 4, 5 & 6, the backgrounds are completely dark. This was achieved by ensuring that there is nothing behind the subject to reflect the light towards the subject.

2) For example 7, I placed a piece of dried leaf directly behind the subject to allow some light to bounce on it thus creating a brighter background.

3) For all 4 examples, I placed a white foam (or any reflective medium) above the lens to bounce all available light back onto the subject, thus capturing better detail on the subjects from the front.

4) Use a Gold-colored reflector if you're looking to produce warmer tones.

5) Deploy the use of a Lens Hood to block off any stray light from entering the lens.

iii) Effect No. 3: "A Beautiful Mess."

Using the light from the flash to create a flaring effect; 
best achieved when the flash head, subject and camera sensor are parallel to one another.


Example 8
Some tips and tricks to consider:

1) Remove the lens hood. You definitely would want some light in! Do ensure that you have a UV filter on to protect the sensor.

2) Angle the flash directly behind the subject, pointing the flash head directly towards the lens.

3) If you have the Live View feature on your camera, use it as you would not want to look through the viewfinder when the flash fires.

iv) Effect No. 4: Shadow & Silhouette.

This effect is best achieved with subjects that are translucent, which would allow light to penetrate through, creating beautiful shadows and silhouettes.


Example 9


Example 10 - Layering this technique with the "basics". Frog remained unlit from the front when reflector (on top of the lens) is removed to prevent light from flash bouncing back onto it. 


Example 11 

Some tips and tricks to consider:

1) When choosing a leaf, find one with an interesting pattern. Experiment with different coloured leaves.

2) Both sides of the leaf have different colour tones. I personally prefer to have the "underside" of the leaf facing the lens as I set off the flash from behind the subjects.

D) CAMERA SETTINGS

There is no "one-size-fits-all" approach to this. Personally, I keep my settings the same just as I would during 'normal' macro photography. I merely manipulate the lights.

1) Shoot in manual mode. For most of my shots above, I generally keep my shutter speed between 1/125th and 1/250th of a second. I generally do not shoot with a tripod, mostly handheld so a fast shutter speed is needed.

2) As a general rule of thumb, keep the aperture large if you want minimal light. For the exact opposite results, dial to a smaller aperture.

3) Switch your metering mode to "spot-metering" if you wish to to keep your background brighter than the foreground. See example 10.

4) If you wish to keep both background and foreground equally bright, switch your metering mode to "evaluative-metering". Alternatively, keep the metering mode to "spot-metering" and engage the use of a (large) reflector instead. I personally prefer to keep my metering to "spot" most of the time and use a reflector.

5) Keep to your native ISO, which is the lowest ISO available. Don't worry, there will be plenty of light in this type of photography!

6) Assign your camera's exposure compensation setting as a short-cut button. You would be using this function regularly.


My attempt at backlighting a Planthopper (Singapore). Notice that i used a tiny onboard flash to trigger the much larger off-camera flash in my left hand, which has been diffused with some packing foam wrapped round the flash head.


Shot in Raya Island, Thailand!
 --------------------------------------------------------------------------------------------------

Thanks for reading and I do hope  that you find this blog entry informative and useful. Please feel free to leave your comments and feedback in the comments section below. If you have your own techniques and tips that you would like to share, please do. I would love to learn from you as well!

Tuesday, 3 March 2015

My Micro 4/3 Mirrorless Macro Equipments

NOTE: I am not a paid staff of Olympus and neither am i getting paid to write this article. I just happen to like their mirrorless system very much. If you have read my first few posts, you would know that I have tried almost every brand out there from various DSLRs and Mirrorless manufacturers. I settled on an Olympus micro 4/3 system because it has (almost) all the features that I need for my macro work. Read more about my journey to mirrorless here.


 IMPORTANT UPDATE (Aug 2016): I have since made some modifications to the design of my diffuser and changed my flash to the Meike MK 320, as shown in the photos above. To see how well it works (or not), you might want to click here, although i would highly suggest that you read the rest of the article first. Video tutorial on how to build the above-mentioned diffuser can be found here!

-----------------------------------------------------------------------------------------------------------------------

Limacodid caterpillar under UV-Light

I know that this post is long overdue but better late than never! I would only be covering the equipments that I use for close-up macro photography and not techniques to keep this entry as succinct as possible.  This was never intended to serve as a technical tutorial. However, I will be providing links to several technical reviews from better qualified individuals throughout this post so please feel free to click on those. 
We all have different needs and level of compromise - What has worked for me may not necessarily work for you. Feel free to adopt or expound on my ideas and if it works for you then great! And by the way, 99% of my shots are handheld with the exception of UV-Light photography where I use a small tripod. In both cases, I use Full-Manual Settings. Without further adieu, let's get started!

Author's Note: I have received some requests for a review of the equipments I use for my Wide-Angle macro and herping (reptile) shots. Be sure to subscribe in 2016 for more updates!


               Close-Up Macro    |    Wide-Angle Macro    |    Herpetofauna    |    UV-Light


1. MY CAMERA BODIES.

I started out with the OMD EM5 (Technical review here) before upgrading to an OMD EM1 (Technical review here). Any difference in the image quality? In my opinion, no, although the latter has some useful features that are absent in its predecessor like Focus-Peaking and an improved inbuilt stabiliser.


Olympus OMD EM5 (Spare Body)


 Front View of the EM5 (apologies for the poor IQ, pictures taken with an old point and shoot camera).


Back View. Very clean layout.


Top View.


With the Olympus HLD-6 battery grip. I highly recommend this.


Back View with the Olympus HLD-6 battery grip.

Key Features that i liked about the OMD EM5:

1) Electronic View Finder (EVF). I absolutely adore this! Gone are the days where you have to second guess yourself about setting the right Exposure or White Balance. Now you are able to see exactly how the Final Image would turn out, even before releasing the shutter! What you see is a true representation of the Final Image. Amazing!


2) Live-view Boost.  With this feature, I was able to practically shoot in relative darkness because for some magical reasons, the monitor stays bright even with ridiculously small aperture values.  This is absolutely crucial in macro work, especially when I have my camera stopped down to f-22, rendering the focus light useless without Live-view Boost.


3) 5-axis Stabilisation. Over time, I have developed some camera handling skills and I would like to think that my hands are stable. Having said that, I am not afraid to admit that many of my shots would not have been possible without this feature.


A tiny Cyclosa sp. with its intricate web stabilimentum design.


Argiope argentata spotted off the rugged Californian coast during my trek to the Big Sur. It was swaying wildly in the wind but thanks to the 5 -axis stabilisation, I was able to freeze the frame with the right settings and handling technique.

4) Size. It is amazing how Olympus has managed to pack so many features in such a tiny body! 


5) Fully customisable. Despite its tiny size, it has more dials and buttons than a F-16 Fighter Jet Cockpit. Even more so for the OMD EM1.


Olympus OMD EM1 (Main Body)


 Front View of the EM1.


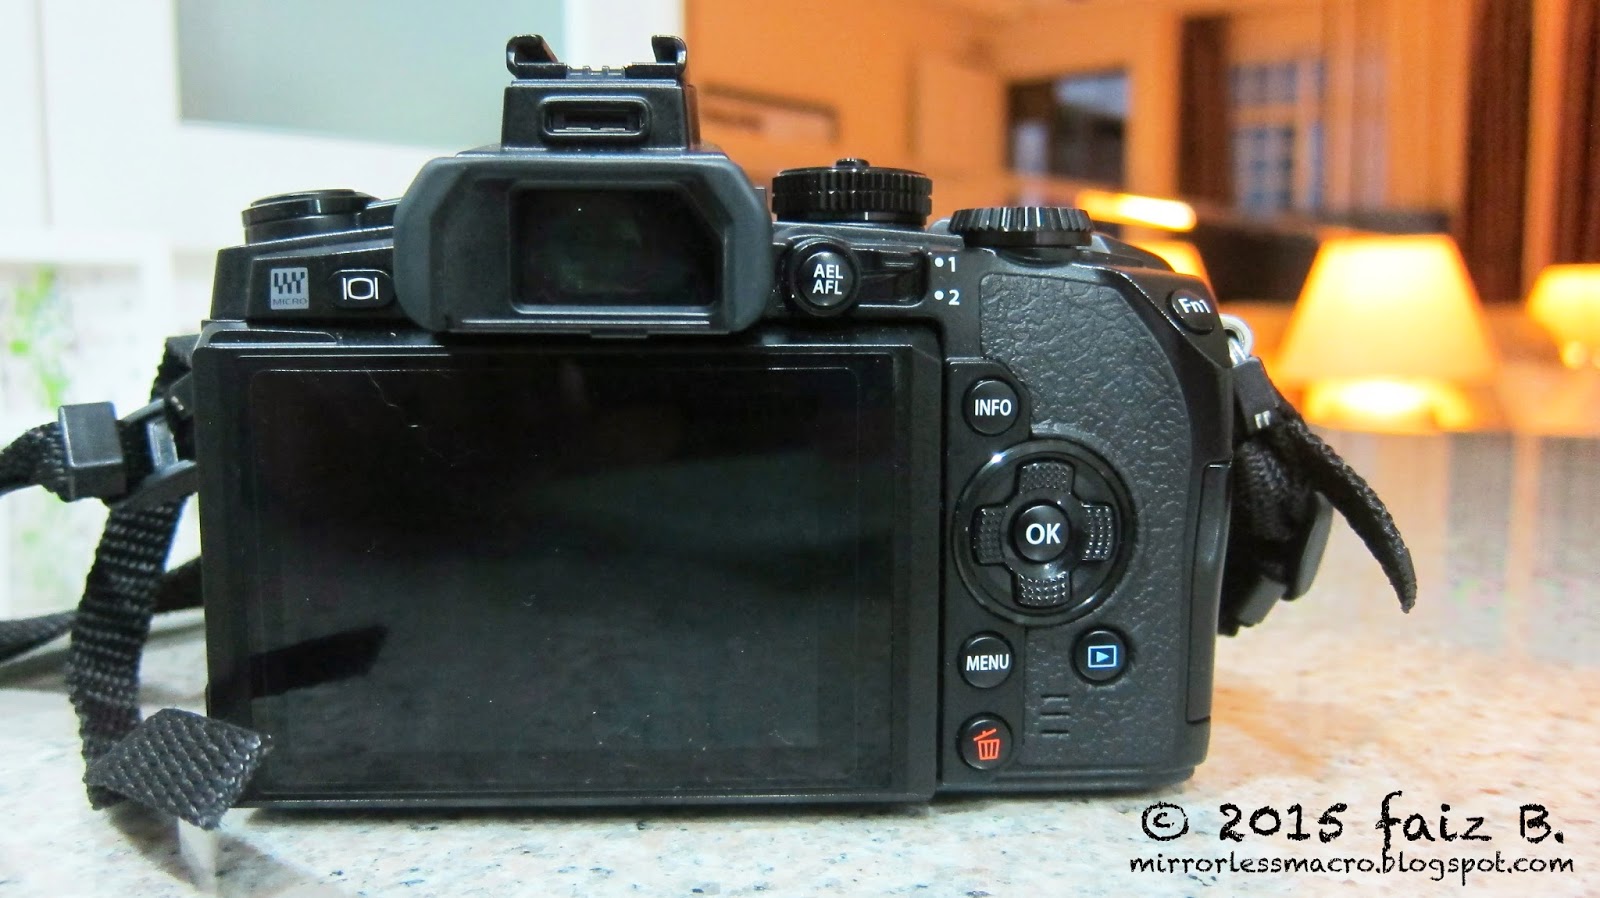
  Back View. 


 Top View. Check out the dials! Better usability than the EM5, in my humble opinion.


View of the OMD EM1 from the side. Notice that I have the focus lights on.

 Key features that i liked about the EM1, above and beyond those already mentioned about the EM5:

5) Focus-Peaking: With a simple twist of the focusing ring, I am able to identify which area is in focus, thanks to the red/white streaks reflected onto the image on the EVF. This feature is usually switched off when I am out in the field because most of my preferred subjects move faster than I can turn the focus ring, rendering it pretty useless. However, for non-moving subjects, this feature is a gem. No idea what I am talking about? Watch this awesome video tutorial by Damien McGillicuddy here!

6) Better Grip. With the EM5, I feel that it slips off the hand pretty easily after a long day of shooting. The remedy? Slap on the Olympus HLD-6 battery grip and instantly it feels like you're holding a different camera altogether. The EM1 comes with an ergonomically-designed finger grip, out of the box.

7) Better weather-sealing: The EM5 is fairly weather-sealed but nothing like what the EM1 has to offer. This tank of a camera have survived many hair-raising encounters (I am a klutz) such as falling from a moving vehicle, amongst other horror stories. I have been caught in heavy rain twice with the EM1 and despite being dripping wet, it worked perfectly fine. You might want to check Blunty's youtube video where he famously soaked the camera in a tub and gave it a good bath.  Watch that Epic video here.

2. MY LENS.

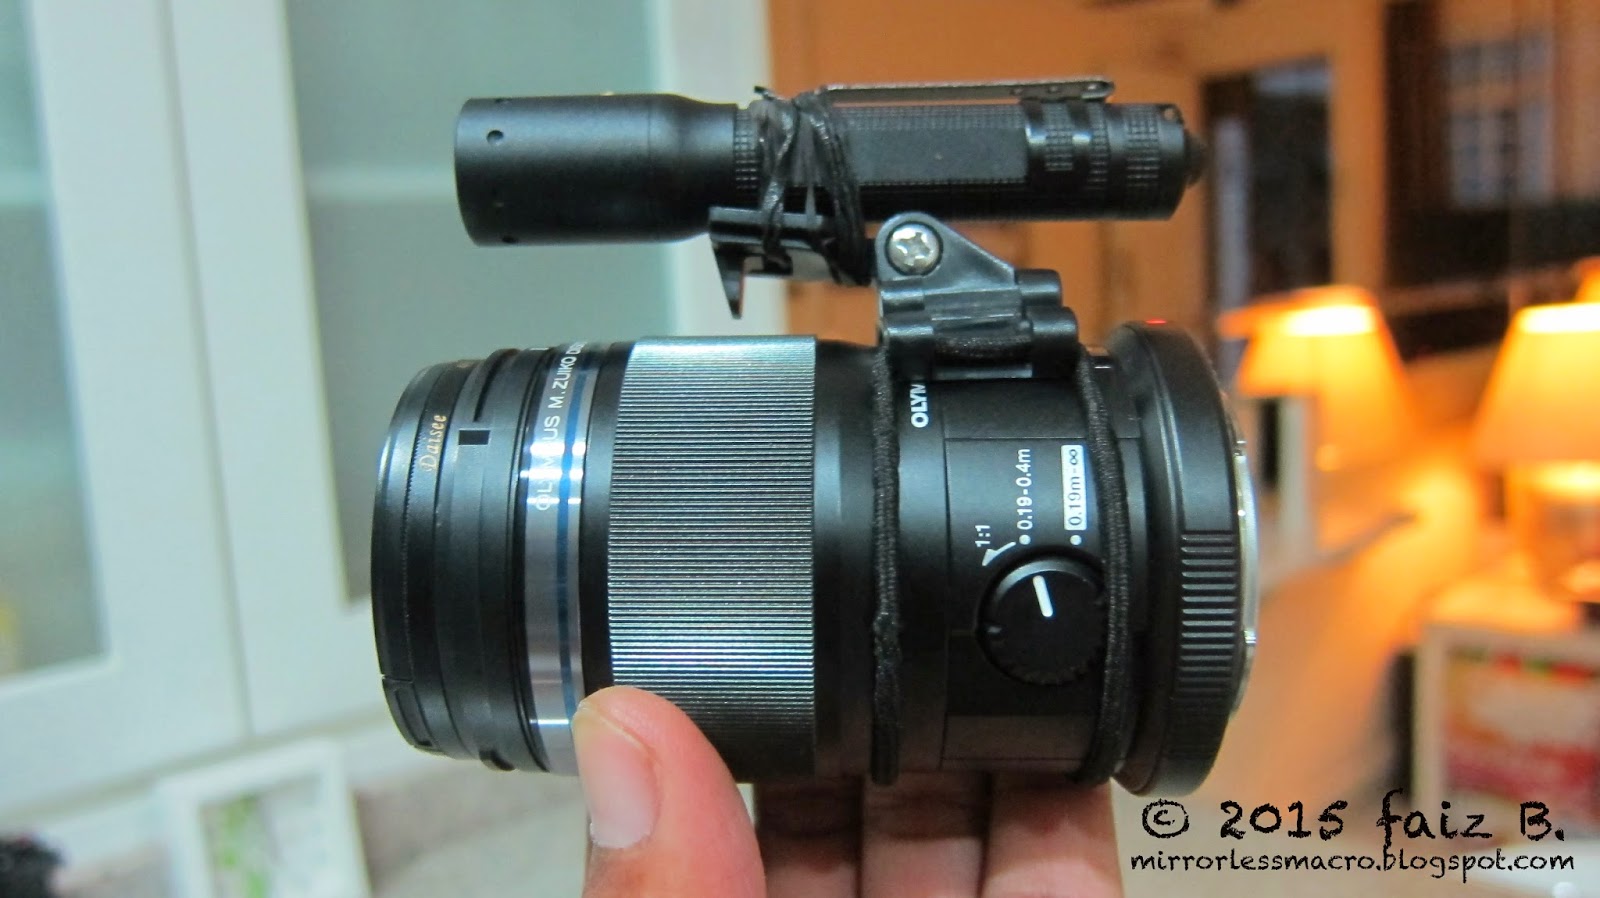
I only have one macro lens now, the Olympus M. Zuiko ED 60mm f2.8. Sold the Panasonic Leica DG Macro-Elmarit 45mm f2.8 ASPH, MEGA O.I.S Lens after acquiring the Olympus lens. (What a mouthful!)


One of the best lens I have owned, hands down. Attached to the lens is a torchlight that I use to focus onto my subjects.

Key features that i liked about this Lens:

1) Weather-sealing: I am constantly exposed to the elements so having a weather-sealed lens helps to keep my mind at ease. What is the point of having an awesome weather-sealed camera body if the lens isn't?


2) It is ridiculously TINY. It is known to takes stellar photos but Image Quality is not what I like love about this lens - It is the size! Have you seen how small it is? Coupled with either camera bodies and the Olympus fl-14 flash, it still weighs less than the Canon 7D body alone. Size and weight is such an important feature because I shoot alone most of the time and do not have the luxury of having others to hold my equipments for me. Take these shots for example:


To achieve these shots, I held my flash (Olympus fl-600r) in one hand, pointing it directly behind the subject while holding the camera in the other, wirelessly triggering the slave from the onboard flash (fl-ML2). I probably would have fatigued quickly if not for my lightweight equipments. For more on this awesome lens from Blunty , click here.

3. FLASHES

I have 3 units, the Olympus fl-LM2, the Olympus fl-14, and the Olympus fl-600r.


Olympus Fl-LM2 that comes bundled with the OMD EM5.


The Olympus Fl-14... Sleek!


Back view of the Fl - 14.


The most versatile Olympus flash ever, the Fl-600r.


View from the back

Many were shocked to find out that my main flash is actually the fl-14 and not fl-600r, despite the latter being the much better flash. Again, it is all about personal preference. Yes, the fl-600r is already considered small in its class but I for some reason I find that it is still too"big" for my liking. I use the fl-600r mainly as my off-camera flash for backlight with the Olympus fl-LM2 as the master flash.


My set-up without the diffuser.


The same set-up but with my DIY Diffuser. View from the side.


How it looks from the front.

With this simple set-up, I am able to achieve shots like these:


Banded Bullfrog (Kaloula pulchra)


An unidentified gecko.

4. MAGNIFIERS

To achieve greater magnification shots, I used the Raynox DCR-250 conversion Lens and an Extension Tube.


Some Cheapo Chinese-Brand Electronic Extension Tubes. Worked well for me.


Raynox dcr-250, a very useful clip-on magnifier that i use to get higher magnification shots.

 Some results from these add-ons:


Arks cf. alatus; 10mm. And yes, it is a spider!


A tiny Asilid perched on a branch slightly thicker than a matchstick. (<5mm)


 Close-up of an Epeus flavobilineatus!


A tiny jumping spider, probably a Carrhotus sp. we found on a Frangipani plant. (8mm)


Harmochirus sp. with prey. This Jumper has a legspan of less than 5mm!

5. DIFFUSION

This is, in my opinion, the most important part of the set-up. Having an ineffective diffusion is akin to having Toyota brakes on a Ferrari, you are compromising on control. Pretty weird analogy when talking about camera set-ups but think about it - You can have all the features that you dream of having in a camera, lens, or flash but without proper control of the lighting i.e. diffusion, the image will almost always fall flat. I engage different layers of diffusion materials depending on the light-reflective nature of my subjects. There is so much to talk about this seemingly simple topic that it deserves an entry of its own.

I will talk in greater detail about my diffusion methods in future posts so do stay tuned! I hope that you found this useful especially if you're still exploring on which camera or system to get. If you ask me, it is certainly possible to take very decent shots with a Micro 4/3 mirrorles system.  

UPDATE: 1) To learn more about my diffusion techniques and flash set-up, click here. 
                  2) To learn more about my backlighting techniques and equipment set-up, click here.